What this document covers
In INBOT Studio Modeling, select a floor plan image and start 3D model generation from that image.
Supported formats are `PNG`, `JPG/JPEG`, and `WebP`. `PDF`, `DWG`, `DXF`, and `SKP` files are not compatible with this upload step.
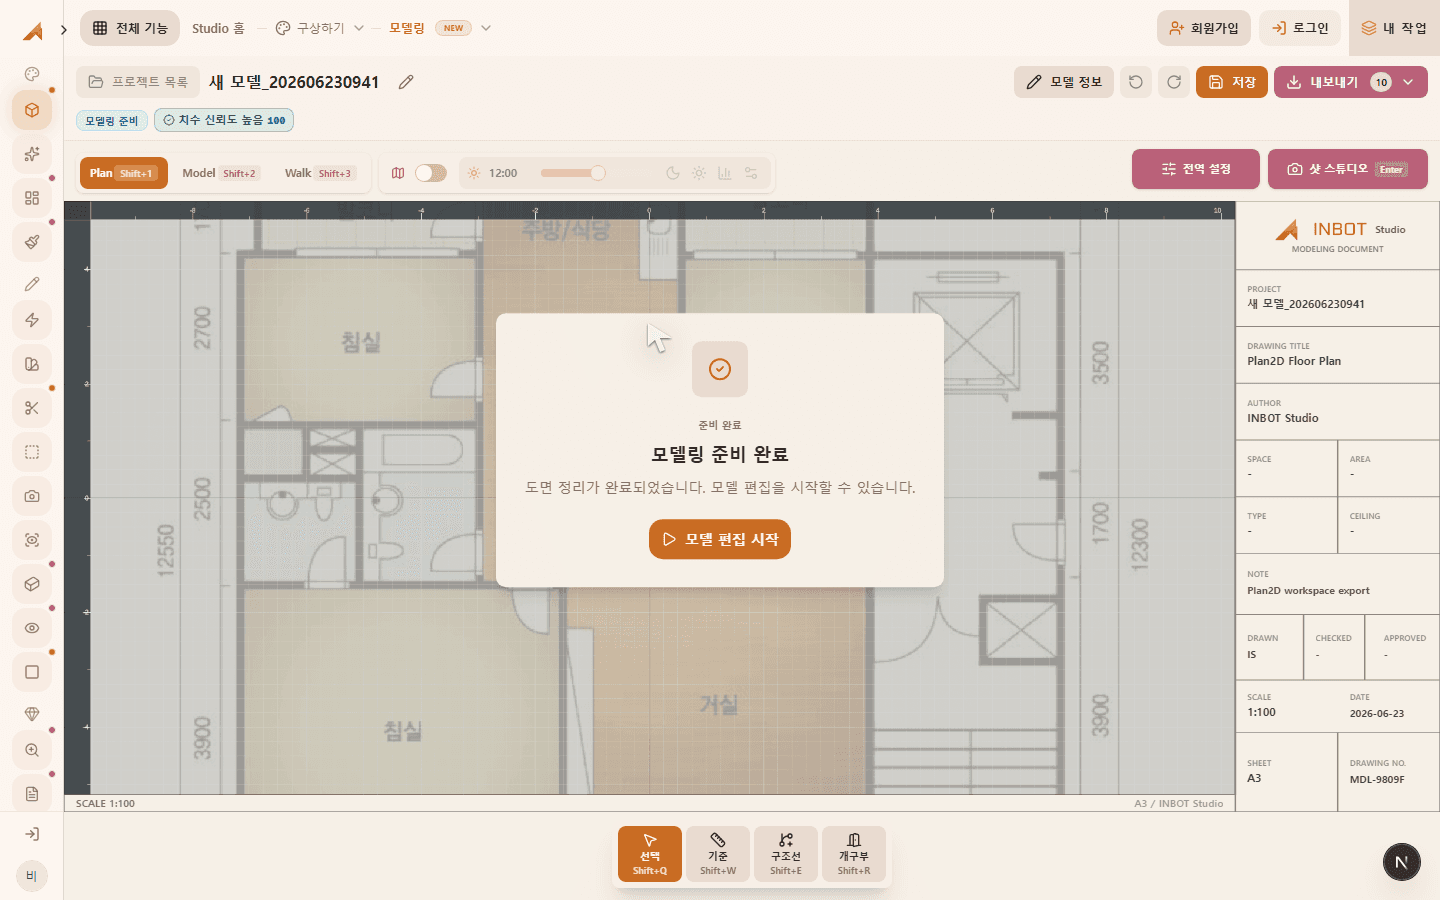
After you select the drawing, the app attaches the file to the current task and starts model generation. When `Modeling is ready` appears, select `Start editing` to open the 3D model editing workspace.
Before you start
Check these conditions before you start.
- A floor plan image where walls, doors, windows, and room boundaries are visible
- A file in `PNG`, `JPG/JPEG`, or `WebP` format
- A drawing with sensitive details such as addresses, client names, and contact information removed
- A stable network connection for checking the generated result
If the drawing is blurry, tilted, or cropped, wall, door, and window recognition can be less accurate. Use a clear image that shows the full layout.
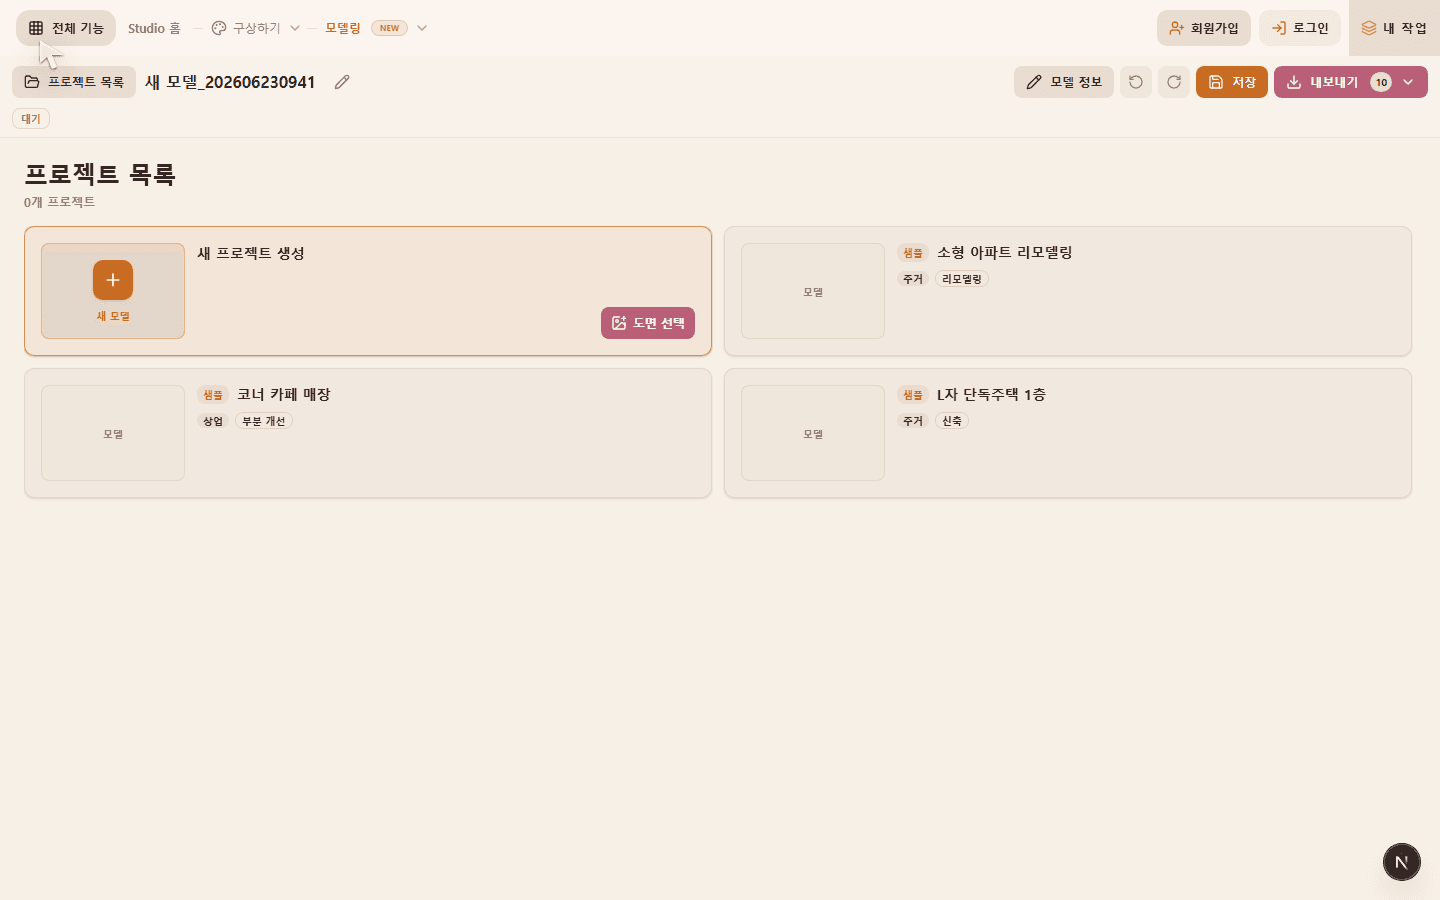
Select the drawing
Open `Modeling` in INBOT Studio and select the drawing action from the model hub.
Choose the floor plan image from the file picker. You do not enter a prompt in this step. Model generation uses the selected drawing image as its source.
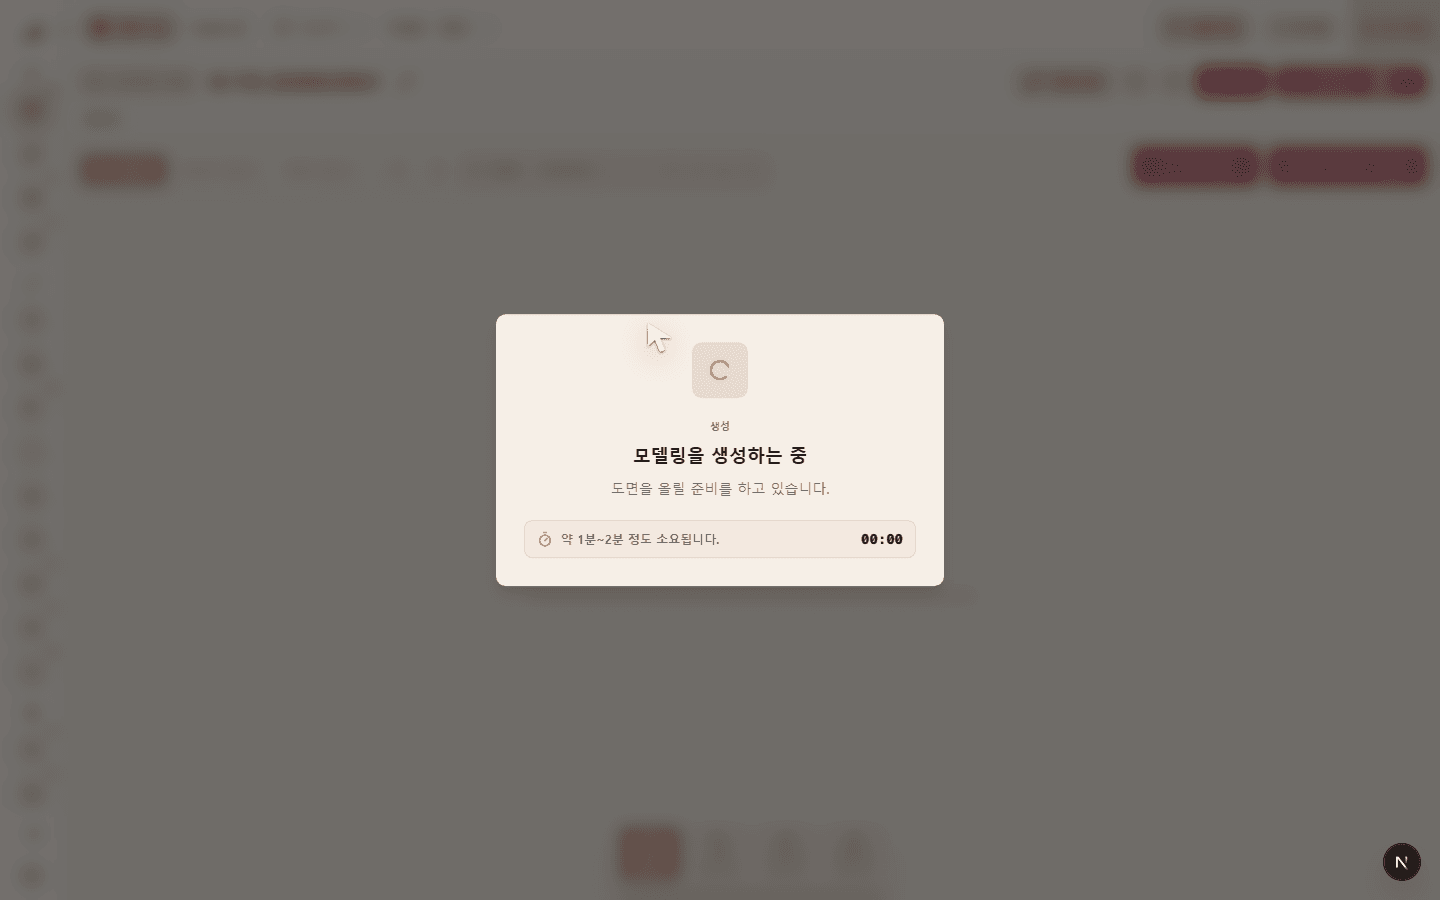
Check generation status
Once the drawing is connected, the `Modeling is being generated` state appears.
During generation, the app prepares the drawing file, organizes wall, door, and window information, and prepares the 3D model. Generation can take time, and the screen shows the estimated time and elapsed time.
Start model editing
When preparation finishes, the `Modeling is ready` state appears.
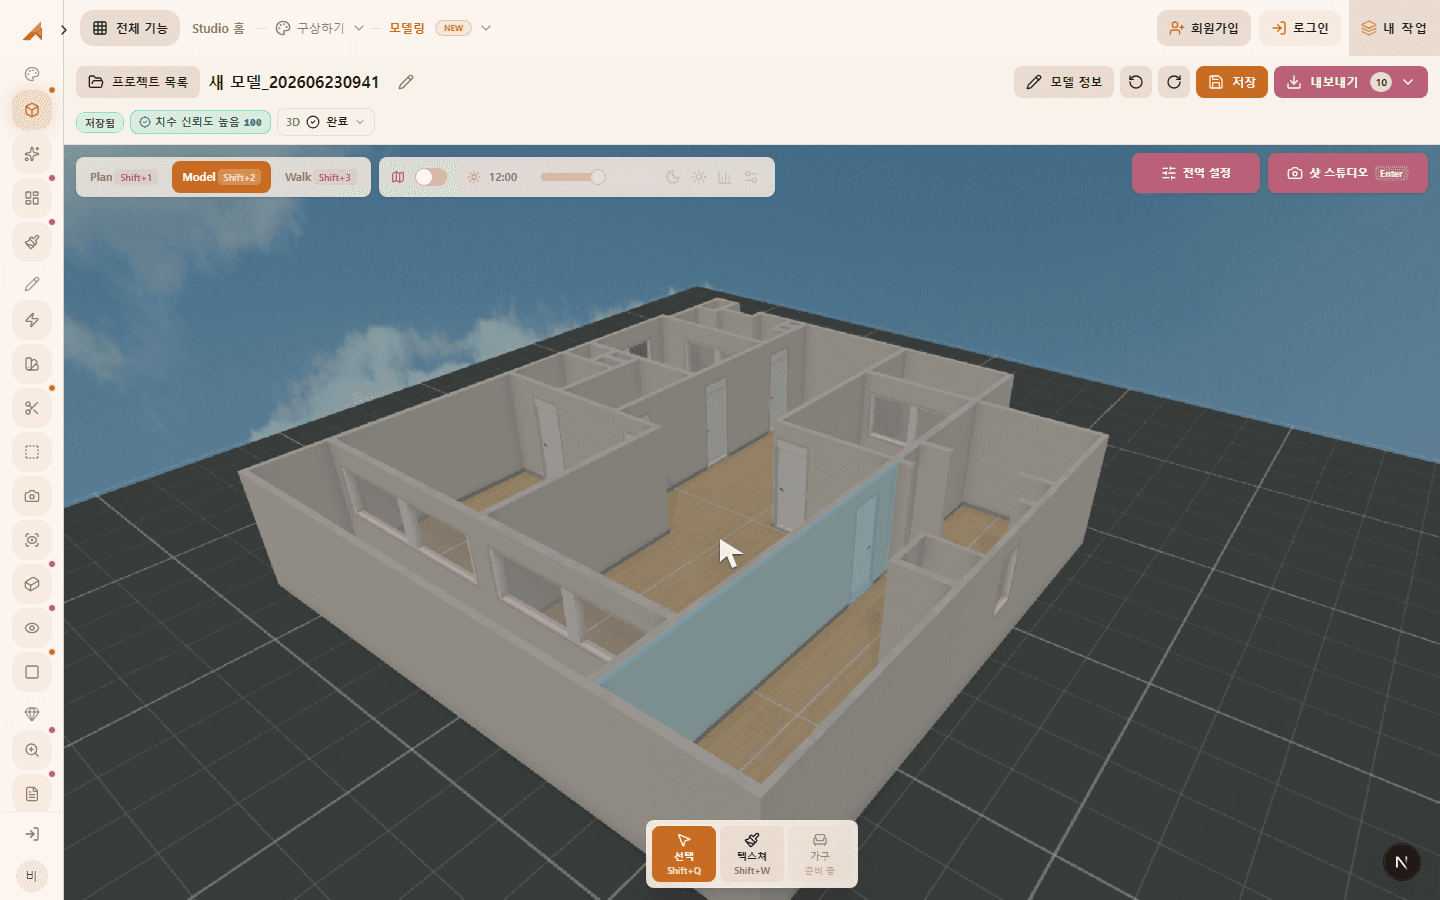
Select `Start editing` to turn the prepared drawing information into a 3D model and open the editing workspace. You can then review the model in Plan, Model, and Walk views.
What to check first
After the editing workspace opens, check these items first.
- Wall positions and direction
- Door and window positions
- Room boundaries and space division
- Overall ratio between the drawing and the model
- Missing or incorrectly recognized elements
The next document covers Plan, Model, and Walk view controls. After reviewing and editing the model, you can continue into saving, rendering, or export to SketchUp/CAD workflows.
Common issues
`PDF`, `DWG`, `DXF`, and `SKP` files cannot be uploaded. Convert them to a supported image format first.
If the drawing is too small or blurry, the generated model may look inaccurate. Try again with a clearer image.
Generation can take time. If the status screen is still updating, the task is still in progress.
When `Modeling is ready` appears, select `Start editing` to enter the editing workspace.